
So, you want to be a blogger? That’s great! Blogging is a wonderful way to share your expertise, life experiences, knowledge, opinions, and can be very therapeutic.
In this article I will share with you the 6 simple steps to get you started. After your blog is all set up and you’re interested in learning how to become a successful blogger, jump on over to my article 5 Simple Steps To Become A Successful Blogger.
Let’s Get Started
You may be wondering, how on earth do I start? Is it expensive? Is it difficult? No. It’s one of the cheapest businesses to start and not nearly as difficult as you may think. I had absolutely no clue about any of this stuff when I first started. Even if you lack technical skills, you can set up a website in no time, or you can hire someone to do it for you (I think this takes the fun out of it). All it takes is a little time, less money than it takes to fill your gas tank, and consistent effort.
Step 1: Choose A Name
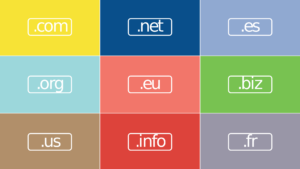
Think of a clever name for your blog and choose a domain name. Mine of course is thebittersweetlife.com. Your domain name should match your site name and preferably end in .com. There are other many other “endings” for your domain name such as .biz, .net, .info and so forth but those are generally more difficult for people to remember, and they may end up on somebody else’s site, which does you no good. After choosing a name, you will be able to check to see if it is available in the box at the bottom of this post.
Step 2: Choose A Host
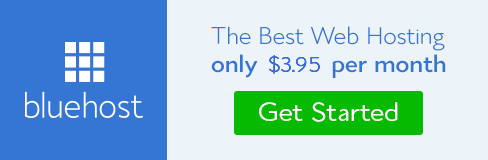
This is who will store your site and display your blog on the internet. There are many hosts and hosting plans to choose from. Blue Host, GoDaddy, Fat Cow and Host Gator are just a few. They all have different prices and run different specials. Some offer free domains and others charge for them. Some have higher customer service and support ratings than others. Choose a host who includes hosting, domain name, and WordPress (see below), for the least amount of hassle. Your site’s email addresses will be included in this as well. Do a little bit of research and then choose what works best for you.
Tip: Higher prices do not equal better hosting. Blue Host is one of the top web hosts and they offer all of what everyone needs in one package. As you can see above, their price is outstanding! I was paying over 3 times that amount with GoDaddy and was not satisfied with their service. Click on the link above to get this amazing deal! For more detailed information on choosing a host please read How To Choose A Hosting Plan and Start Your Blog.
Step 3: Choose A Platform

There are many blogging platforms to choose from as well. I do not suggest choosing one that’s absolutely free due to lack of control, little to no chance for monetization, and being very limited in what you can do because of many restrictions.
WordPress is a highly popular platform to create websites/blogs. This is what you will use to build and manage your site. You will have a dashboard to log in to, to create your posts, customize your site, see statistics on how well your site is doing, and much more at your fingertips. Once WordPress is installed, you get to start the fun part – your blog! This is where you will create your posts for the world to see. Isn’t that exciting?
Step 4: Choose A Theme
A theme is the template that you can customize to have the look and feel you would like for your blog. Do not let yourself get intimidated by this step. There are so many themes to choose from it could make your head spin. Make a list of what features you would like and the vibe you want to give and go from there.
First off, let me tell you from learning the hard way, DO NOT CHOOSE A FREE THEME. I may be the most frugal person you have ever heard of, and try to cut costs as many ways as I can in life, so I chose a free theme to begin with for one of my websites. Huge mistake! That site was hacked and I had to pay to fix it. A year after that issue was resolved, the theme “broke” and my website was a disaster, which again took time to somewhat recover. In order to do that I had to choose a new theme, which I paid $32 for, and put everything back in place. The new theme has many more customization options and looks so much better than the free theme. I didn’t even know what I was missing!
Perform a Google search for WordPress Themes, then search any of the sites that appear. I have used Themeforest which offers a wide selection. An important factor for a theme these days is making sure it is a responsive theme. This means it will be displayed correctly for anyone who is viewing your site on a desktop computer, tablet or phone. Decide what look you want for your site and what you are portraying. There are themes that are professional, fun, whimsical, or for business, fashion, photography, etc. Purchase the theme and then go to your WordPress Dashboard to upload and activate it. Voila!
Step 5: Customize Your Blog Your Way
This is one of the parts I love. Choose colors, layouts, widgets, menus, headers and backgrounds to let your blog express who you are and what you are offering. You can also add plugins for various reasons such as to display statistics about your website traffic, improve speed and performance of your site, add social media icons if your theme didn’t come with them, add forums, add widgets that you can place ads in, etc.
Step 6: Start Writing

Creating your first post is as easy as clicking on Post in your dashboard, then Add New. All of the other work is done and you should be smiling from ear to ear now. Start typing and don’t stop until your heart is content. Let your creativity flow, it’s smooth sailing from here.
To learn more about writing and how to become a successful blogger, please read
5 Simple Steps To Become A Successful Blogger
To learn how to make money from your blog please read
7 Ways To Turn Your Blog Into $$$
If this article was useful to you, please leave a comment below. Thank you!
